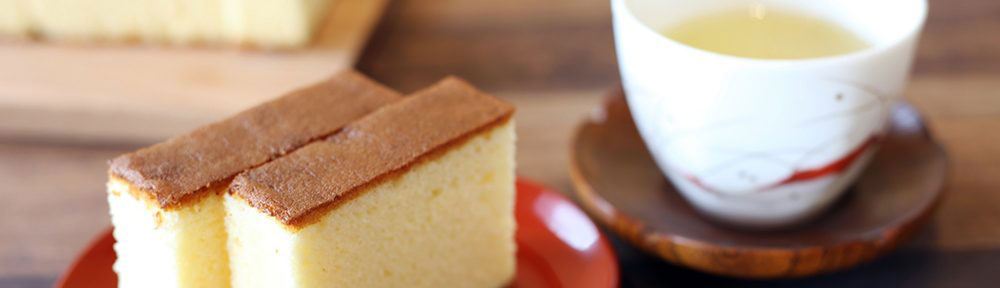
Foreign Foods in Japan –
Kasutera!

Cake is a universally loved food. It’s enjoyed when celebrating the most festive of occasions, with elaborate tiers, layers of filling, and decorative frosting. It can be enjoyed with a humble cup of perfectly brewed tea, and comes in a variety of shapes, flavors, and textures.

Perhaps one of the most favored types of cakes is the classic sponge cake. These cakes have an interesting history, and can be found in food cultures spanning across the globe in countries such as Asia, Europe, North America, and South America. The sponge cake, as we know it today, was thought to have been invented during the Renaissance by a chef named Giobatta Cabona. Giobatta Cabona worked for the Genovese Ambassador to Spain in the mid-1700s and Cabona created the cake for a formal banquet that the Ambassador was hosting for the Spanish delegation to Italy. He named his light and airy cake Pate Genoise, which was then named Pan di Spagna in honor of the Spanish Court. His Pan di Spagna became popular throughout Europe, and was thought to have been brought to Japan by Portuguese merchants who were afforded special trading privileges in the port of Dejima in Nagasaki in the 17th century. The Portuguese called this cake Pao de Castela, meaning “bread from Castile,” in Spain.

That classic sponge cake was Japanized into Kasutera sponge cake.

Kasutera Cake is made using flour, eggs, sugar, and honey. Unlike European and American sponge cakes, Kasutera Cake does not use any additional fat, such as butter or oil, and as such, requires a high-protein flour such as bread flour, which has a higher gluten content, to help it maintain its light and airy structure. The airiness comes from the way the eggs are combined with the sugar and beaten until the mixture is full of air and falls off the whisk in ribbons. The bounciness of the cake also comes from combining double-sifted flour into the egg and sugar mixture and mixing it very gently. Kasutera Cake is most often flavored with honey, preserving one of the most delicious parts of making sponge cakes, which is adding a touch of flavoring. A classic Victoria Sponge Cake will have a bit of citrus zest while Malaysian Pan Dan Cake will be flavored with hints of coconut. In Kasutera Cake, honey adds a touch of earthy sweetness, which helps it pair with various types of teas.

The Kasutera Cake batter is cooked on low heat, another signature of sponge cakes, at around 320°F for about half an hour. When the cake comes out of the oven, it has a gorgeous golden-brown crust on the top and bottom and a soft yellow crumb on the inside. Like many other sponge cakes, Kasutera Cake is not served immediately. It is wrapped in plastic and stored for up to 12 hours before serving, in order to enhance the moistness of the cake. Also, unlike Western sponge cakes, Kasutera Cake is typically baked in a rectangular loaf pan, instead of a round cake pan, and served in approximately one-inch slices, without any garnish, curds, creams, or jams.

So many of the Japanized foods are savory and we’re so happy to have this sweet delicacy to add to our list. Have you tried it before? If so, share your love of this lovely cake with us below!

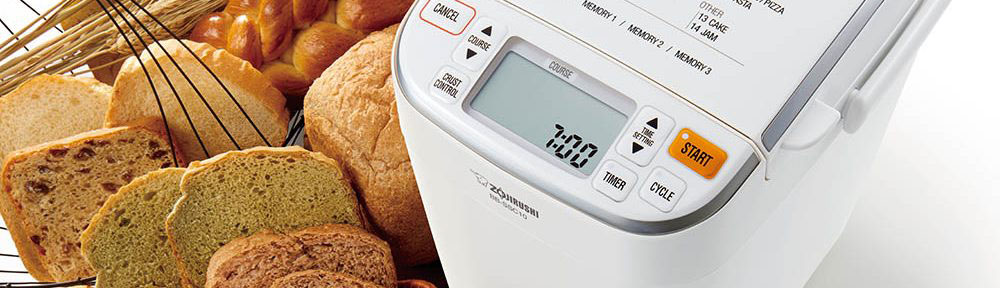
Product Inspirations –
Home Bakery Maestro® Breadmaker (BB-SSC10)
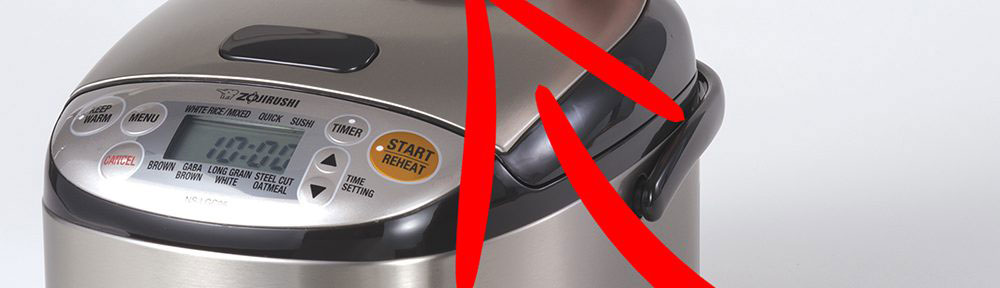
Our Home Bakery Maestro® Breadmaker has so much to love – it’s a small powerhouse that makes hugely satisfying breads, doughs, cakes, and jams!

This breadmaker is compact and comes in a modern white design. It has a small footprint, about the size of a letter-sized paper, taking up minimal counter space, and makes 1-pound loaves, perfect for smaller families. The Maestro features a wide selection of 15 course settings, which control the kneading, rising, and baking functions based on the type of bread, dough, cake, or jam to be made.

Ten of the fifteen course settings are for baking bread, including traditional loaves like White, Whole Wheat, and European, as well as settings for Quick White and Quick Whole Wheat. Along with the traditional course settings, the Maestro offers healthy settings for Multigrain, Gluten Free, Salt Free, Sugar Free, and Vegan breads.

The Maestro comes with special course settings for doughs, cake, and jam too. The Bread/Pizza Dough setting is great for producing things like Whole Wheat Pizza Dough and Naan bread, while the Pasta Dough course setting lets you make homemade pastas like Spinach Pasta. Quick cake breads like our scrumptious Lemon Loaf are easy with the Cake setting and our unique Jam setting lets you make fruit preserves without constant stirring over the stove.

While these course settings are all amazing, we really, truly love our Homemade setting! This course setting allows you to store up to three custom programs, so you can control the knead, rise, and bake times per recipe! We’ve even come up with a recipe that we had to call our Meatloaf Miracle, because it was made in the breadmaker using a Homemade course. (Check it out in the recipe booklet that comes with the breadmaker!)

Our Home Bakery Maestro® Breadmaker can make all of these recipes because of its smart features. It uses a removable, nonstick coated Baking Pan to hold the ingredients, and mixes them with a single Kneading Blade, which is secured into the Baking Pan on a sturdy, rotating shaft. It also utilizes double heaters built into the bottom of the breadmaker to rapidly heat the interior of the Baking Pan so that breads are springy, light, airy, and have gorgeous crusts. It also has a new, distinctive feature – the Auto-Add Dispenser. Instead of requiring you to keep track of when to add ingredients such as dried fruit, nuts, and seeds during the knead cycle, the Auto Add Dispenser holds these ingredients and works with the breadmaker’s intelligent microcomputer to add them to the dough at the right time during making. The easy-to-read LCD control panel accesses the brains of the machine and lets you choose the course setting as well as select the crust color. It also allows you to set an optional 13-hour delay timer.

In true Zojirushi tradition, the pan, along with all surfaces that come into contact with food, are BPA-free and cleaning is simple. The Baking Pan, Kneading Blade, and Auto-Add Dispenser pieces are all removable and hand-washable.

Accessories include a full color recipe booklet with 50 delicious recipes, liquid measuring cup, and measuring spoon.

The recipe booklet has amazing recipes, and you can find more on the special website we’ve dedicated to this amazing little bread maker. Check out recipes like Party Bread and Matcha Swirl Bread. Best of all, we’ve loaded eight how-to videos to help you perfect your bread and dough making skills!

If you’re already an owner of the Home Bakery Maestro® Breadmaker, share your favorite creations with us below. And if not…get one now!


Design Explained –
Our Steam Vent Caps

Do you know that most of our rice cookers have a cap on the steam vent? Compared to conventional rice cookers, our advanced rice cookers – the ones that utilize a microcomputer – are sleeker, with tight-fitting components and lids. We make these rice cookers with steam venting systems that consists of three components – a vent, a vent cap, and a vent cap receptacle.

This is the Steam Vent Cap!

Each piece of the venting system has a purpose. The vent is a tube-like opening that goes through the cover and inner lid, into the body of the rice cooker where the inner pan rests. The vent is covered by the steam vent cap, which rests in the steam vent cap receptacle, keeping it securely on the cover of the rice cooker. The entire system is built to seamlessly blend into the top of the rice cookers. One customer even brought his appliance into our office inquiring about the system because he didn’t realize it was there!

Can you spot the Steam Vent Cap?

The steam venting system works in conjunction with good rice prep. The first step is to correctly measure the right amount of rice and water. Then, it’s important to wash the rice correctly, removing excess starch and bran or dust from the rice kernels. Once the rice begins cooking, the rice cooker releases excess steam through the vent, and the steam vent cap catches any foamy substances that come out with the steam. The rice cooks better this way because the steam vent cap allows the rice cooker to cook your rice at a higher heat, without worrying about overflow because the steam vent cap can capture excess moisture and bubbles that may foam up.

Yay for delicious rice!

As long as the vent cap is washed under running water and the steam vent cap receptacle area is wiped with a soft cloth to remove any moisture, the steam venting system in your Zojirushi advanced rice cooker should work wonderfully. Remember to remove and clean the inner lid and you’ll have perfectly cooked rice every time!

Don’t forget to remove and clean the Inner Lid!

Check out our full line up in the Products section, and be sure to comment with any questions you might have.


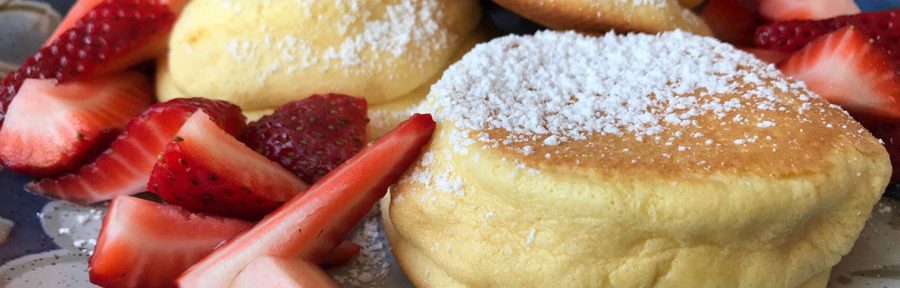
Japanese Soufflé Pancakes

Have you seen these fluffy Japanese Pancakes all over social media lately? I stepped out of my comfort zone last weekend, just to try my primitive cooking skills at making these babies. Not bad, eh? I’d say it was a success! (But I have to admit after a lot of trial and error and a lot of eggs) Mind you, I’m not totally helpless—I’ve done pancakes before. I mean, breakfast is relatively easy. But these were a real challenge and nothing like regular pancakes. So good! Light, airy, jiggly and fluffy!

Equipment:
Zojirushi Gourmet Sizzler Electric Griddle
Turns out this was great for making pancakes because I had so much room to work with. The temp settings are too high for Japanese Pancakes but I was able to adjust by tweaking it a little. More on that later. The included lid is necessary, so I wished it was clear so I could have seen the pancakes as it cooked, but there’s ways to get around that too, if you need to.

Recipe:
My basic recipe was from Tasty Japan, but I also got a lot of tips from Just One Cookbook on the basics of baking.
Ingredients for 4 servings
2 egg yolks
4 egg whites
1/4 cup sugar
3/4 cup pancake mix
1/2 cup milk

Japanese Pancakes require 2 things for success. Egg whites beaten to the right stiffness to make meringue and low temp steaming to bake. Making the batter was easy, the egg whites need to be finessed.

First get the egg yolks, sugar, pancake mix and milk into a bowl so you can whisk them together. Make sure not to leave it lumpy!

The egg whites need to be beaten with an electric blender. Some recipes called for them to be beaten with powdered sugar, instead of using granulated sugar in the batter. Preference thing, I guess. Anyway, the trick is to whip the egg whites until they get stiff enough to form peaks. I would do it at the highest speed.

Here’s one I did with powdered sugar. See the peaks?

By the way, did you know there are such things as egg white separators? This was a great gadget! No mess and it really gets all the whites separate from the yolk! Lot better than transferring the yolk from one shell to the other like old school!

This really works!

Next you fold the meringue into the batter. Don’t mix it in so thoroughly that it flattens the egg whites. All you’re doing here is combining the two parts.

And now you’re ready to put it on the griddle! Here’s a word about the griddle. This is a soufflé pancake, so you’re supposed to cook it on low heat for a long time, and covered with a lid. This recipe called for 10 minutes, while the steam did most of the cooking. My Zojirushi Griddle’s temp setting only goes as low as 300°F, which is way too hot for slow cooking these pancakes, so I actually had it on a setting barely above Keep Warm.

Here’s my setting.
The pour!

I used a bowl to steam it on low heat. Clever, right? With this griddle there was plenty of space so it was easy to do this. I did a couple with a pancake mold, which some of these recipes call for, but you don’t really need them to get them to come out fluffy and tall. If you do use molds, make sure they’re made of silicone like this one. You don’t want to scratch the griddle surface with metal. To get your pancakes taller, spoon the batter onto the surface, wait a little as it starts to cook, and layer more batter directly on top of it. It’s cooking so slow anyway, you’ve got plenty of time to do this.

“Update: Zojirushi does not recommend using this griddle at this temperature setting or using glass bowls on the surface. This post does not reflect usage guidelines provided by the manufacturer.”

Looking good…

When you’re ready to turn them over, put a spatula under it and roll them over gently. You can’t flip these guys. Dress with strawberries or powdered sugar or whatever you like. I really didn’t even need any syrup—they were already just the right sweetness all the way through.

Yummy!

For more pancake recipes from Zojirushi, try these. They’re not the soufflé kind, but they look delicious!

Blueberry Whole Wheat Pancakes

Gluten Free Pancakes

All photos by Bert Tanimoto