Bert-san’s Take—Zojirushi Breadmaker

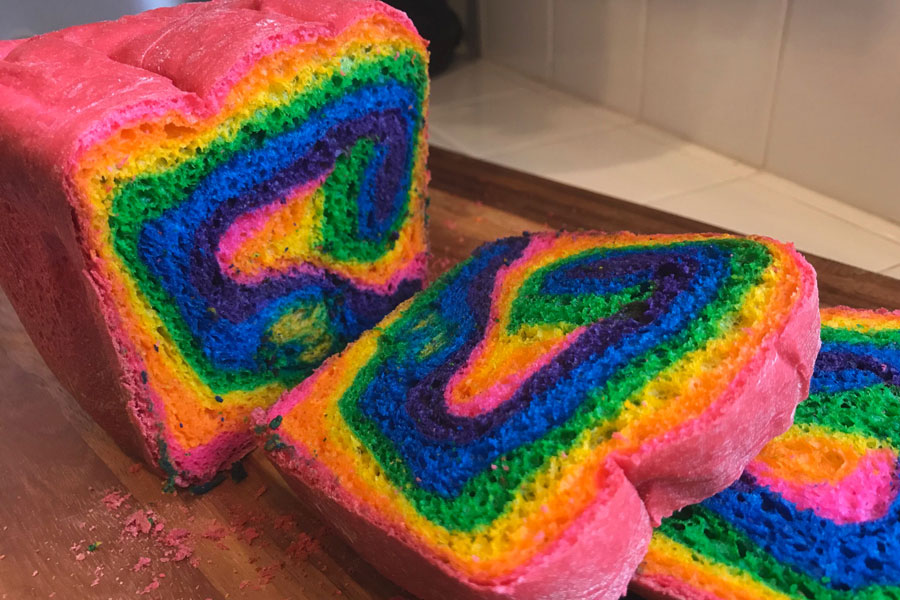
Who knew I could actually bake? And that my Rainbow Bread could look so beautiful? I mean, I cannot believe I did this just by following instructions (which I’m really good at) and literally pushing a button. BUT…I’m taking credit where credit is due; even though this crazy amazing breadmaker by Zojirushi does all the heavy lifting, I did have to make the rainbow part, and it wasn’t easy.

Indeed, the trickiest part of baking with the breadmaker might very well be reading the manual. It’s written out pretty well, but for a novice like me, I read and re-read it so I wouldn’t screw up, and I still managed to stumble on a few steps. I baked with the Zojirushi Home Bakery Maestro® (BB-SSC10), which is perfect for us because it’s compact and bakes a 1-lb. loaf; we can’t eat that much in a span of 3-days anyway.

The first thing I did was line up all my ingredients for a simple, basic white bread—flour, dried milk, sugar, salt, unsalted butter, dry yeast and water. Then I studied:

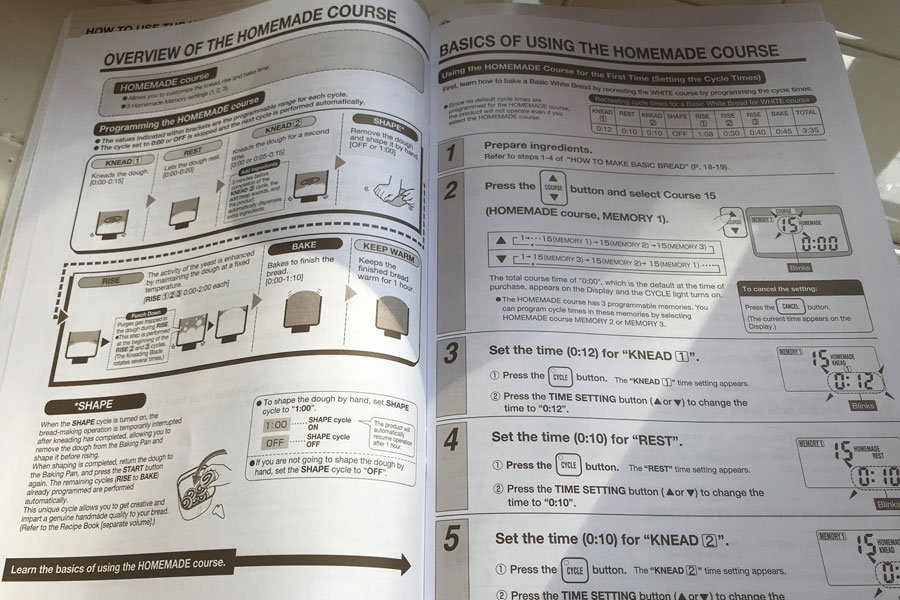
After carefully measuring all the ingredients, I started to load the baking pan, and promptly forgot to add the yeast last so it wouldn’t get wet. This is what it’s supposed to look like (my second try), with the water underneath all those dry ingredients, and the yeast sitting on top.

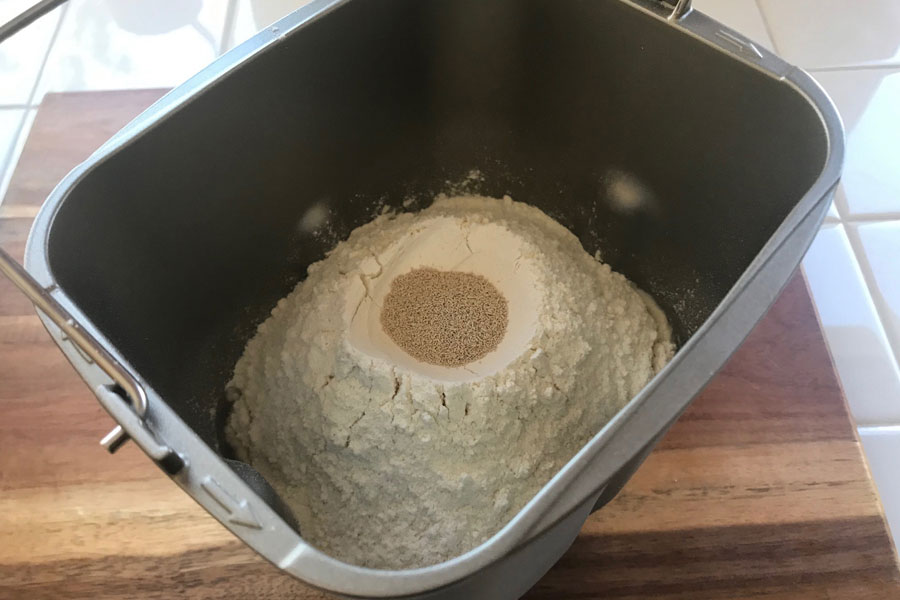
Then the breadmaker does the rest—which is great if you’re baking plain white bread, but I was planning Rainbow Bread, so I was supposed to interrupt the cycle to add food coloring to the dough. My second mistake—I set the cycle wrong so I had to let it go and settle for plain white bread this first time around. Oh well, I needed a test run anyway!

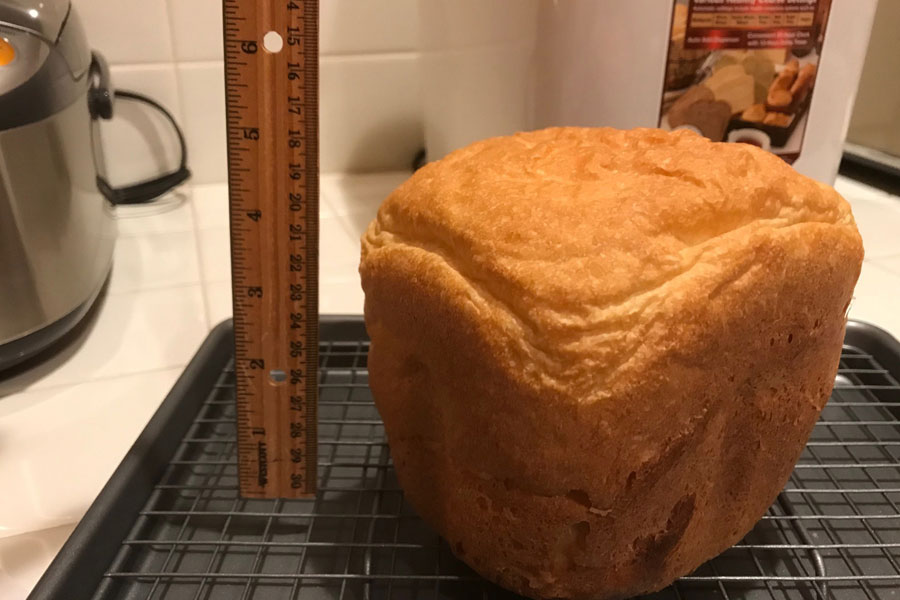
The unveiling of the finished loaf! So exciting! And it smelled soooo good!

Not bad for a first try. The golden color was great, and it didn’t collapse on me—LOL! And by the way, the fresh bread tasted like…homemade bread! Moist and warm. If you decide to keep it for a few days, I’d recommend toasting it by the 3rd day. Trust me, you’ll still love it.

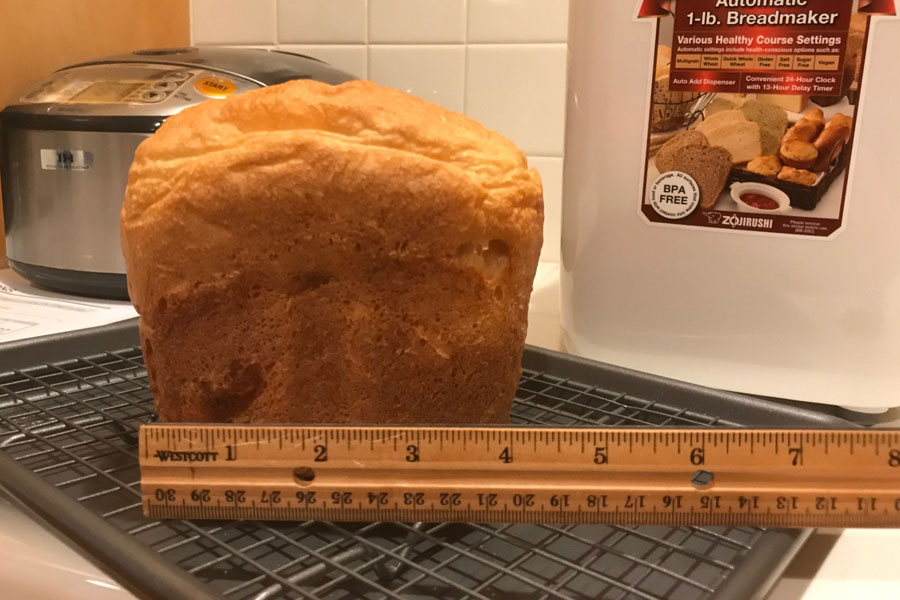
Here’s how I did my Rainbow Bread. The Breadmaker has a homemade setting, which allows you to take out the dough after it’s been kneaded and before it bakes. This gives you some time to do whatever you want to the dough—like add extra ingredients, or in my case, add food coloring. The dough is very sticky, but if you have enough flour on your hands, it’s manageable.

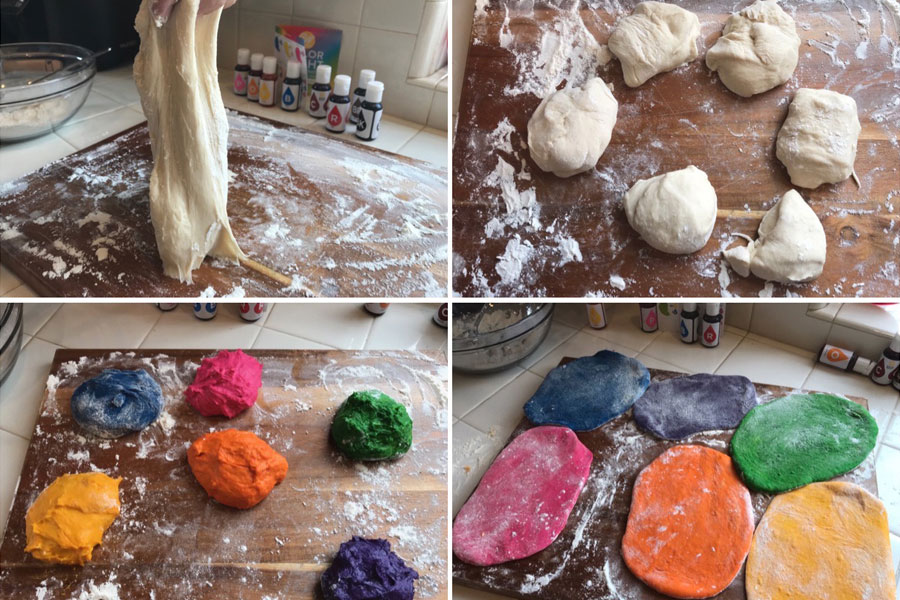
Then you flatten it, stack it, and roll it up!

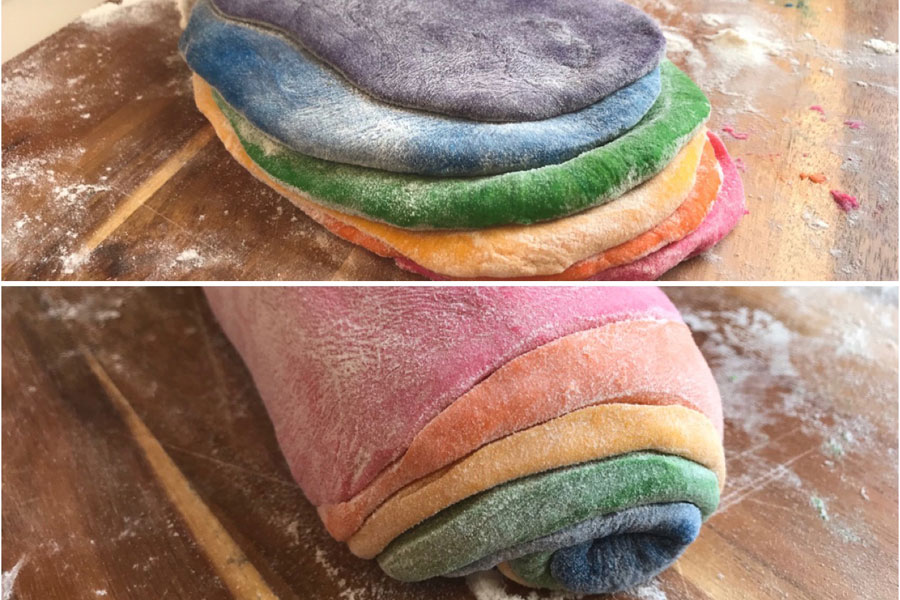
After you reload it into the Breadmaker, the cycle starts up again, and the machine does the rest. The longest wait time is by far this part—the dough sits and rests to give it time to rise, and then finally bakes. The total from start to end was about 3-1/2 hours (not including the coloring part). But doesn’t it look amazing? Like a sculpture, if I do say so myself!

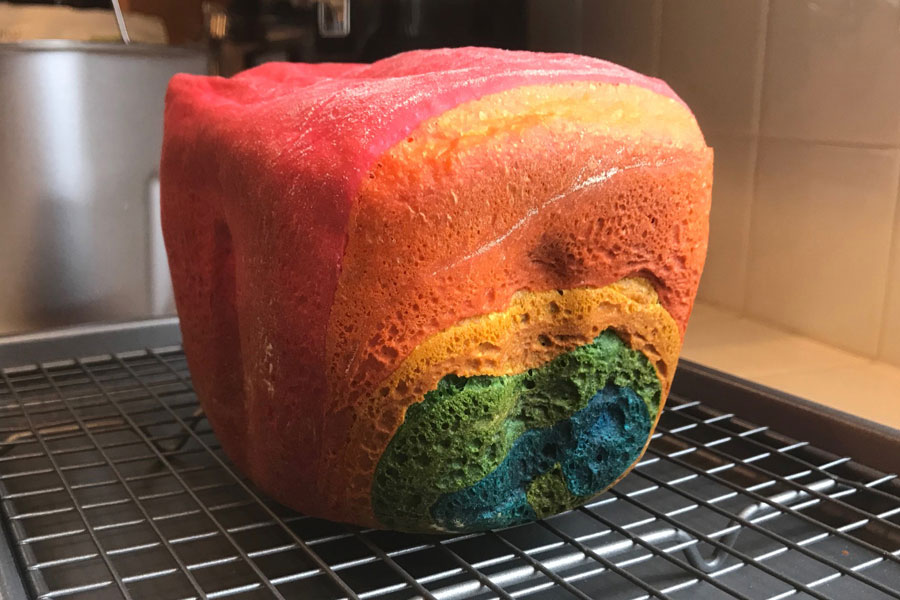
I have to admit this was a lot of fun and was an awesome weekend family activity. I can’t wait to try the other breads on the menu, like European and the Cinnamon bread; my family wants to do more Rainbow bread in pastel colors!


Images by Bert Tanimoto and @ironchefmom


This entry was posted in From Bert-san by Bert Tanimoto. Bookmark the permalink.

About Bert Tanimoto

Oldish father (still) of two youngish (but now young adult) kids. Zojirushi enthusiast and professional writer. California resident with roots in Hawaii and Japan. Classic rock, popcorn movies, audio books, spam, sushi and cone filtered coffee. Guilty pleasures include donuts and pop bands like ABBA and Wham! Don't laugh, you should see my vinyl collection--I give hair bands and prog equal credit.

18 thoughts on “Bert-san’s Take—Zojirushi Breadmaker

  1. I wondered about the “punch down” caption which appears in the operating instructions in the “Course List” on page 17, under the “Course Overview” where the first 11 courses (1-11 of 15) have a “Punch Down” caption appearing in the “Rise” portion of the timed cycle for each of the first 11 Courses on the list. Is that “Punch Down” the equivalent action of punching down the bread at that moment, taken by the bread machine? Or is it something we are supposed to do manually. I presume it is something done by the bread machine because I can find no other reference to “Punch Down” anywhere else in either of the Operating Instructions or the Recipe Book.

    • “Punch Down” is a process of pressing down on the dough to remove some of the gas bubbles that were formed while the dough was rising. Removing some of the gas will bake bread with finer grain, which results in a softer bread. Also, this step prevents the dough from over-proofing. Based on the course selected, Zojirushi breadmakers automatically determine the best timing to punch down and do it for you, so that you can set it and forget it!

      • When using Homemade course, if I program RISE 1 only and set RISE 2 and RISE 3 to 0:00 (i.e. I turn it off), will the punch down be turn off also? I’d like to turn off the punch down for a sourdough recipe.

        • Hi Lisa, Rise 1 does not include a punch down because it happens immediately after kneading. If you only use Rise 1 there won’t be any punch down. Now, please keep in mind that the punching down between rises helps with making sure the loaf doesn’t rise too high and to get rid of large air bubbles which improves the texture of the bread. Hope this helps!

  2. If you want to add dried cranberries to a bread recipe from the Zojirushi recipe book, can they be added to the extra ingredients container in the lid as part of the same recipe? Or do we have to create a “Home Recipe” in order to add extra ingredients using Course 15?

    • I think the ingredients container in the lid is designed to drop whatever you want into the dough during the baking cycle automatically. That means you don’t have to use the homemade course #15. When I made my Blueberry Bread I used an online bread machine recipe and simply used the container as part of the recipe. But make sure you use dried cranberries because the dispenser won’t work too well with a wet ingredient like fresh fruit.

  3. Is it OK to remove the kneading blade after all the kneading functions are complete, just before the final rise so that a smaller hole will be made in the bottom of the finished baked loaf.

    • Hi CR, it’s not recommended to remove the kneading blades during the course since it will disrupt the dough’s rising. Usually the loaf will be shorter that expected if the kneading blades are removed during the process. Based on customer feedback, if the kneading blades must be removed, then it should be done before the last rise. We hope this helps!

      • Does the stir cycle sound like the kneeling cycle? I never hear anything but one or two clicks. My bread is short and very dense. It is a brand new unit so I’m wondering if it is defective. I have the BB-HAC-10

        • Hi there. Yes, I believe the stir cycle is the same as knead. And I only hear one or two clicks on mine too, but the blade is definitely turning.

          I don’t know why you are getting short and dense bread–make sure you measure the ingredients accurately and load them in the order suggested. Liquids go in first.

  4. In the DOUGH course, there is a PUNCH before the 2nd rise. After the completion of the entire DOUGH course and when I remove it from the BM, must I punch it down again before I share the dough to individual pieaces

Leave a Reply

Your email address will not be published. Required fields are marked *